Eclipse, CVS and the ARB project
Before following the steps below, I assume you have an up-to-date installation of eclipse including the CDT package. There are a lot of FAQs in the internet how to get this done. :-)
The information given below might be incomplete or outdated. Eclipse options and dialogs differ from release to release.
Use chapter 1 if you have downloaded the ARB sourcecode from our homepage.
Chapter 2 is for ARB developers with access to our repository.
Chapter 3 is necessary for both installation types.
Chapter 1: Create a new project based on the ARB source package.
Please download the latest sourcecode archive (arbsrc.tgz) from the ARB Project homepage. You can either look at the main download site or have a look at the latest build.
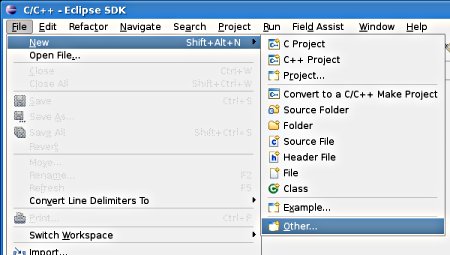
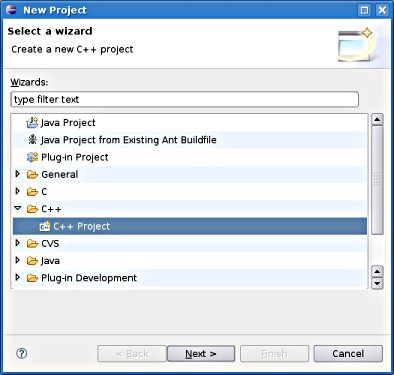
After downloading the file run eclipse and select File -> New -> C/C++ Project.
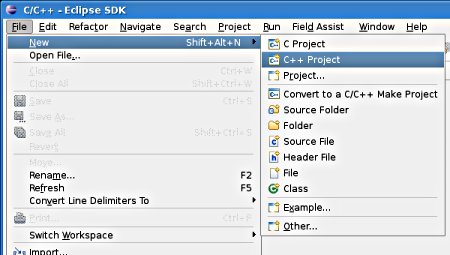
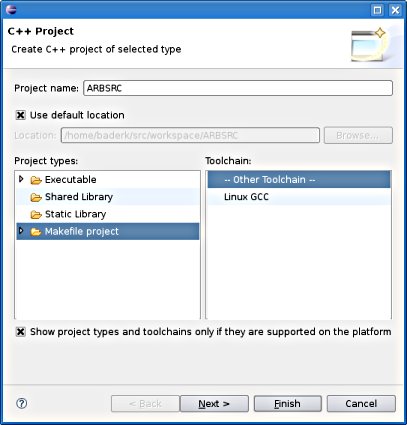
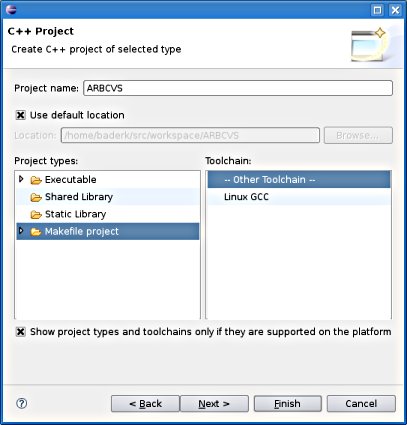
Choose a project name (here: ARBSRC) and select Makefile Project -> -- Other toolchain -- as project type. Other settings aren't necessary so you can just select Finish to create the project.
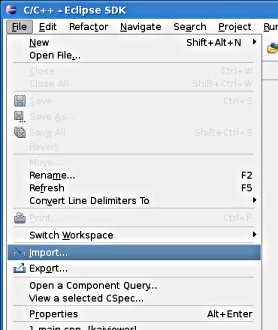
Now you have to import the source files from the archive, select File -> Import from the menu.
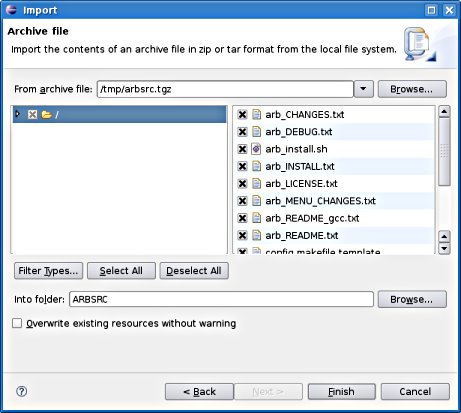
In the import dialog select General -> Archive as import source.

Now you have to select the previously downloaded ARB source archive and select your project folder as destination. Other settings aren't necessary, just click onto Finish here. Continue with chapter 3.
Chapter 2: Using the CVS repository as source for an ARB project
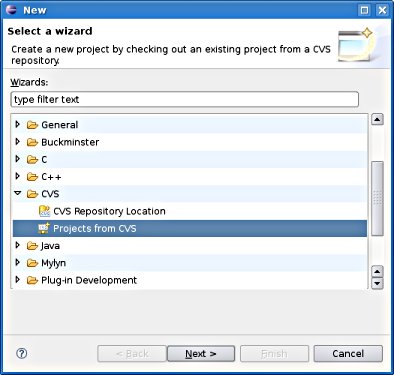
Select File -> Import and there CVS -> Projects from CVS in the menu.
In some cases this selection isn't available. Just try New -> Other and in the wizard dialog select
CVS -> Projects from CVS instead.
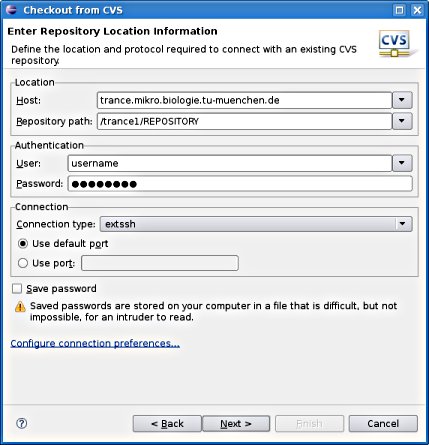
Host: trance.mikro.biologie.tu-muenchen.de
Repository path: /trance1/REPOSITORY
Connection type: extssh
Enter your username and password.
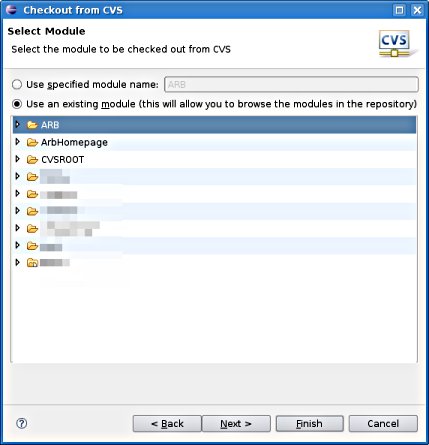
Select the module name (name of the repository): ARB
You can use the browse button to select it or enter it by hand. After that you can just
safely click multiple times onto Next until finally the project wizard appears.
In the project wizard dialog select C++ -> C++ Project as your project type.
Choose a project name (here: ARBCVS) and select Makefile Project -> -- Other toolchain -- as project type. Other settings aren't necessary so you can just select Next multiple times to create the project.
Chapter 3: Setting the ARB environment variables
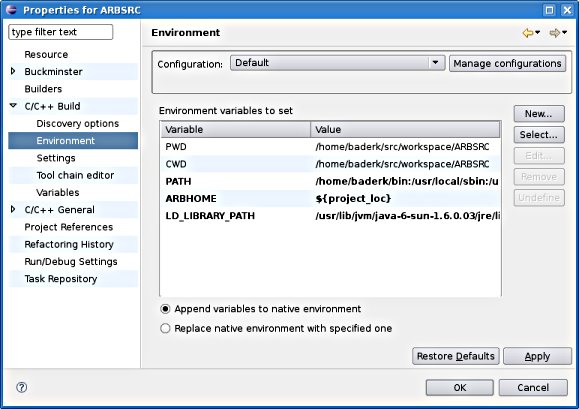
Right-click on your project in the Project Browser and select Properties from the menu, or press [alt]+[enter].
Open C/C++ Build, select Environment and add the three ARB environment variables:
ARBHOME: ${project_loc}
LD_LIBRARY_PATH: ...:${project_loc}/lib
PATH: ...:${project_loc}/bin
Caution: I'm using the dots ... to symbolize the previous content of the variables.
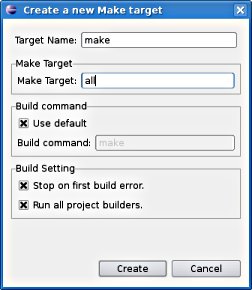
In the right ares right click on your project in the Make Targets folder. Add a new make target. If the Make Targets view not visible, activate it
by selecting Window -> Show View -> Make Targets in the Menu.

Choose a name for your target (here: make) and set the Make Target to all.
You can also add other useful targets, i.e. clean or rebuild.
In a last step you have to switch to a console and cd to the project directory.
In the directory you have to create a file called config.makefile
You can copy the config.makefile.template in the directory and modify it. (I know, details on the parameters in this file are missing here.)
If everything is set correctly you are at this point able to click on make all and successfully compile the ARB sourcecode.